[DIY Leverless Controller] Build #2: Crafting a Multi-Platform Leverless Controller with Raspberry Pi Pico & Budget Parts (Part 1: Setup & Firmware Guide)
 Admin
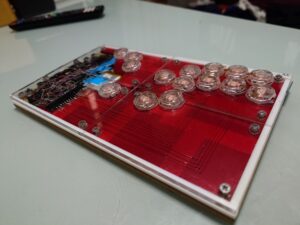
In the previous installment, "Part 5: Implementing the SOCD Circuit," Build #1 was successfully completed after a brutal, gritty battle—stacking two 74HC132 logic ICs in point-to-point free-air wiring within an ultra-cramped space just to keep it wireless using a recycled board.
While we managed to achieve "neutral" on simultaneous left/right inputs via hardware logic, my son plays "charge characters." Catering to his playstyle required modifying the behavior for simultaneous up/down inputs (such as switching to Last Input Priority / Last Win). While theoretically possible on hardware, doing so would require adding about four more logic ICs. Considering the agonizing effort of painstakingly hand-soldering four more airborne chips into that tiny case, it was obvious that the labor would be purely painful.
"You know what? Forget wireless. Let's just use a Raspberry Pi Pico!"
And with that decision made, Build #2—dedicated entirely to my son—switched to an RP2040-compatible board. By shifting to software, we could elegantly solve the SOCD "Last Win Priority" toggle without the overwhelming hardware grind.
This setup allows us to seamlessly conquer multiple real platforms: not just Street Fighter 6 on PC (Steam), but also Street Fighter 30th Anniversary Collection on the Nintendo Switch (for Street Fighter II), and even original PS3 hardware running Ultra Street Fighter IV (USFIV). It's a smart, versatile multi-console build designed for absolute fun across generations.
In this guide, we'll cover the entire initial setup from scratch: flashing firmware onto the RP2040-Zero, mapping custom wiring, and mastering intuitive console mode toggles.
🛒 Behind the Scenes: Parts Shop Despair & AliExpress "Knockoff" Fears
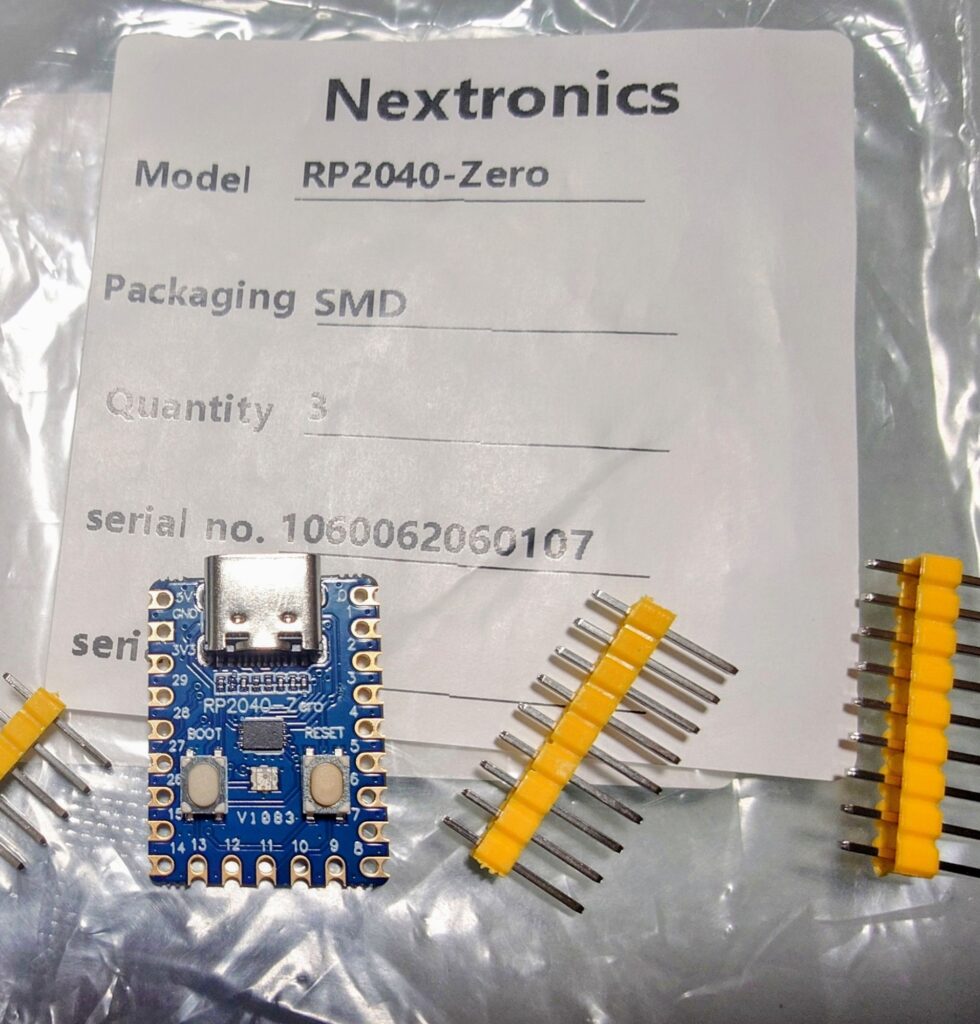
First came procuring the heart of the project: the RP2040-Zero. I rushed over to my local electronics shop, Kaho Parts Center, but they didn't have the model I needed in stock. Instead, I spotted boards powered by the newer "RP2350" chip (like the Pico 2). Being completely new to the Raspberry Pi ecosystem, I mistakenly thought it was just a sketchy third-party knockoff with a similar shape, so I skipped it.
On top of that, when I asked Gemini AI about compatibility, it gave me slightly outdated info: "There is no official binary yet; you'll have to compile it yourself from source." That sounded like a hassle, so I passed (though, in reality, the latest v0.7.12 already supported it smoothly).
Ultimately, I opted for the battle-tested, familiar 2040 architecture and ordered a 3-pack from the "Flextronics Store" on AliExpress. In DIY electronics, having spare parts is a must since things breaking—or getting broken—is practically part of the routine. The three boards cost an insanely low 1,222 yen (roughly $8 USD), and to my pleasant surprise, they arrived from China in just 7 days.
4 Simple Steps to Set Up Build #2
Setting up the RP2040-Zero once it arrives takes just four straightforward steps:
- 1. Install the firmware
- 2. Boot into your desired controller mode
- 3. Configure button bindings (pin mapping)
- 4. Set up SOCD modes
Step 1: Installing the Firmware
First, download the firmware file.
Visit the GP2040-CE downloads page:https://gp2040-ce.info/downloads/
Download the firmware corresponding to your board type.
Since mine is a Waveshare RP2040-Zero clone, I grabbed "GP2040-CE_0.7.12_WaveshareZero.uf2".
If you can't find it there, check the GitHub releases page directly:https://github.com/OpenStickCommunity/GP2040-CE/releases/
Next, flash GP2040-CE—the brain of our controller—onto the micro-controller. It's super simple, just like copying a file to a USB flash drive.
- Connect to your PC via USB
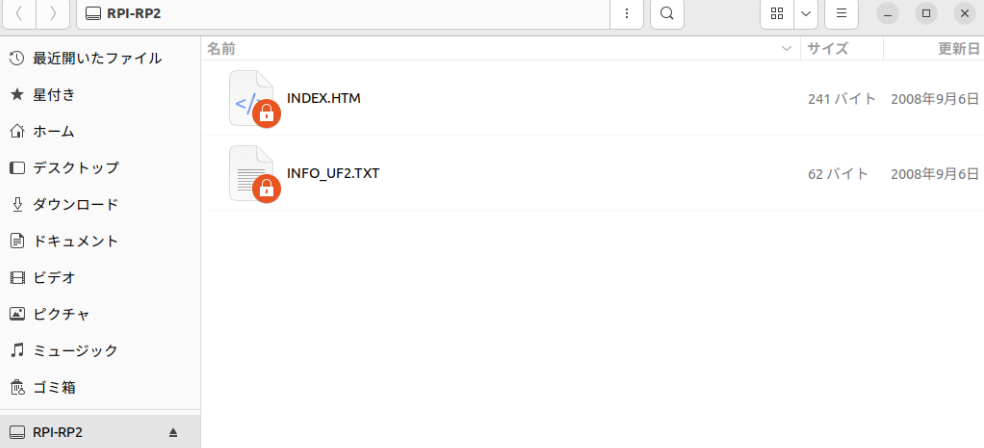
Since a brand-new, factory-fresh board has no code on it yet, there's no need to hold the BOOT button. Just plug it in with a USB cable, and your PC will automatically detect it in flash mode as theRPI-RP2drive, popping open the folder window.
- Copy the firmware
Locate the firmware file you downloaded (e.g.,GP2040-CE_0.7.12_Pico.uf2or your specific board's .uf2) and drag and drop it into theRPI-RP2drive.
- Automatic reboot & unmount
Within seconds of dropping the file, flashing finishes and the drive window closes on its own. Firmware installation is complete!
After this, you can verify it's working by briefly shorting GND to any GPIO pin using tweezers. I'm doing this on Ubuntu and checking the inputs with a gamepad tester app, but on Windows, you can simply use the built-in Game Controllers control panel.
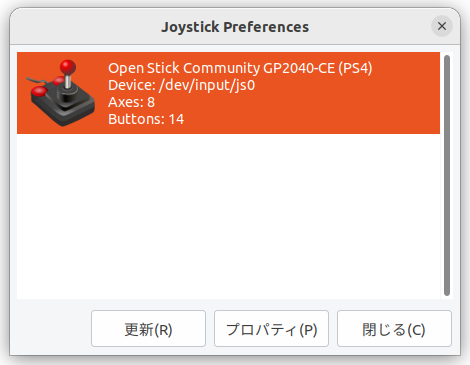
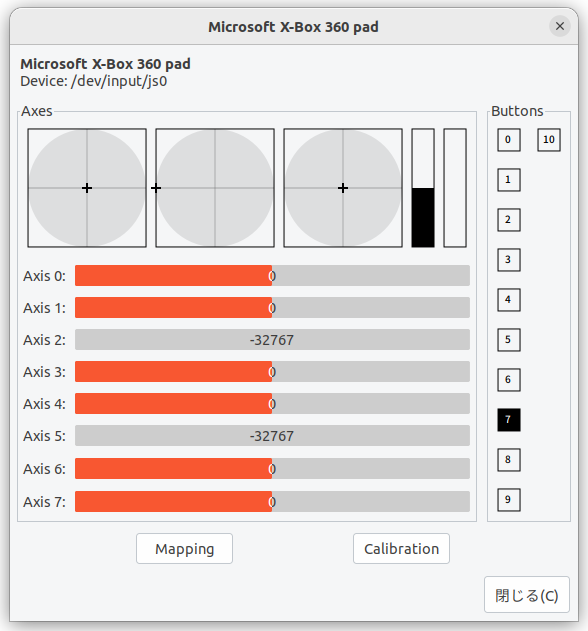
How fun is this?!
Step 2: Button Configuration (Pin Mapping)
If you route wires based on the cleanest, shortest physical paths rather than standard pinouts, the default button layout will be completely scrambled. Open the built-in Web Configurator to map each button to match your personal wiring notes.
Accessing the Web Configurator
Normally, you hold the START button while plugging the board in. But with a custom wiring layout, you won't know which pin is START yet! The tweezers trick is the fastest way around this.
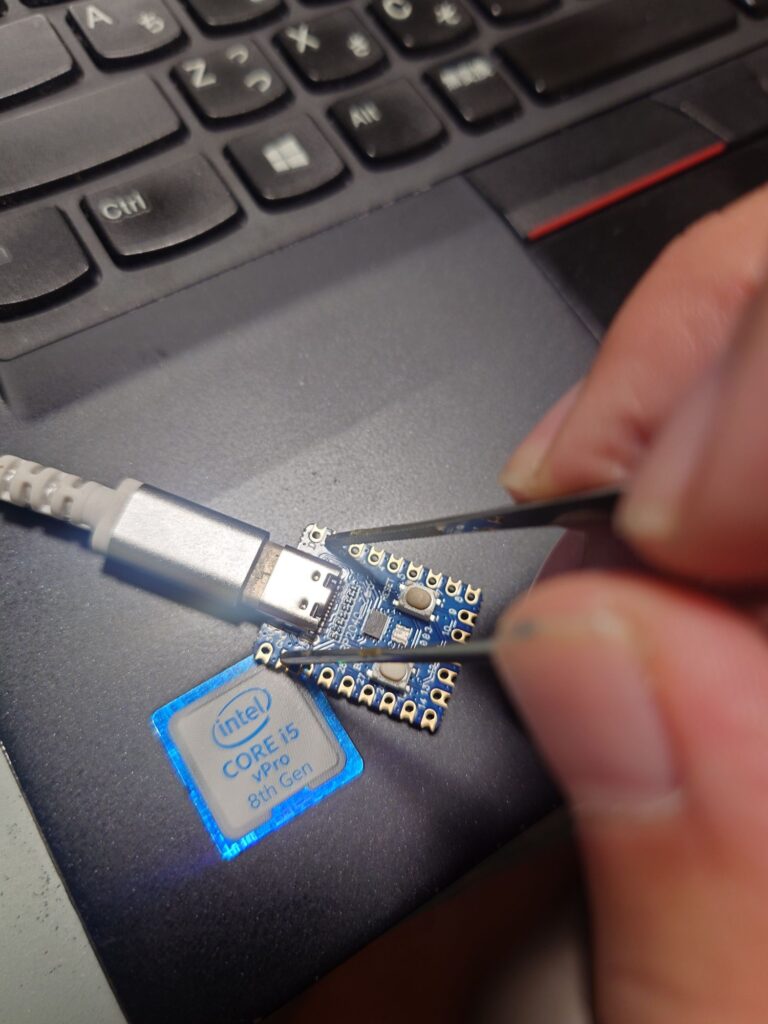
- Open a web browser (like Chrome) on your PC and navigate to
http://192.168.7.1(it won't connect just yet). - Find the default START pin (internal code S2 / button 7 on the input tester), which is
GP01(located directly across from GND), and short it toGNDusing metal tweezers. - While keeping them shorted, press the board's "RESET" button once. This launches the onboard web server.
- Reload the browser page you opened earlier, and the GP2040-CE Web Configurator will appear.
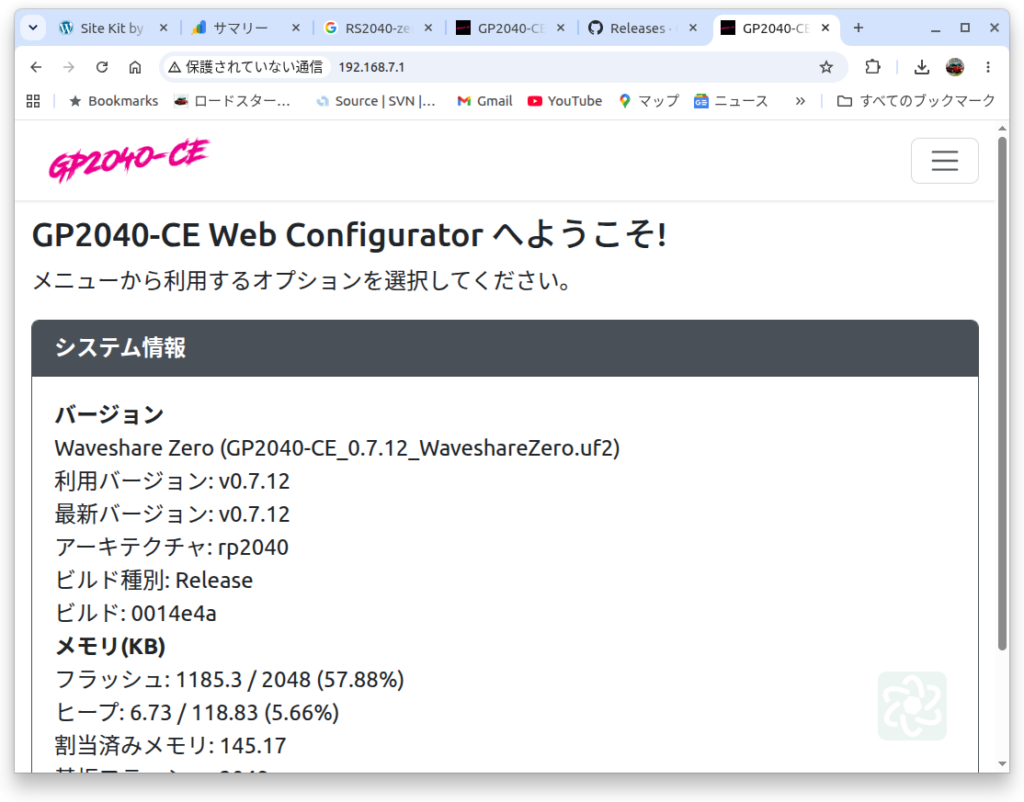
Assigning Pin Mappings
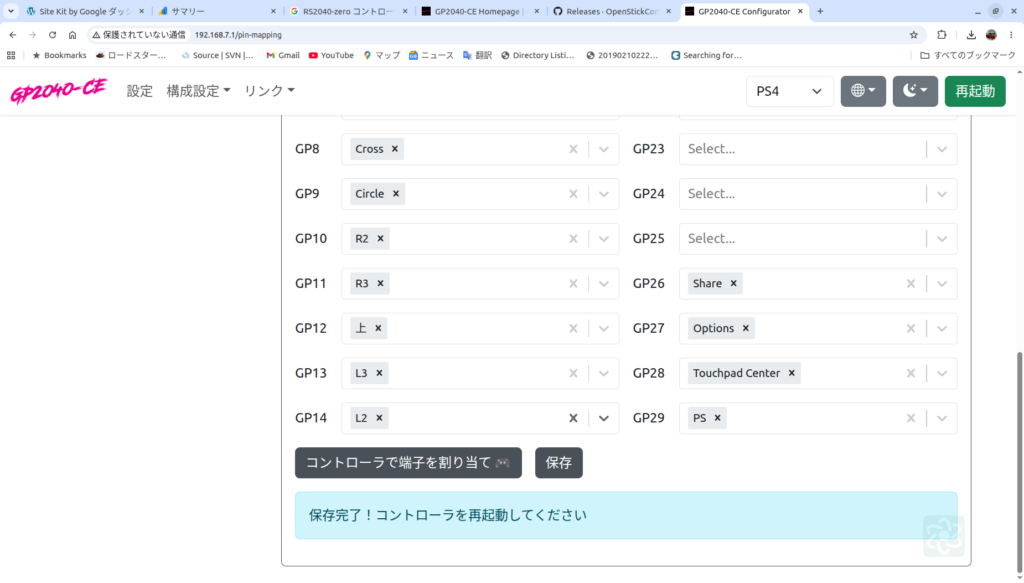
- Once the interface loads, choose your preferred language and set the button labels to "PS3" or "PS4" mode so buttons are clearly labeled as "Cross," "Triangle," "Options," etc.
- Refer to your custom wiring notes and assign the corresponding "GPxx" pin numbers to each button via the dropdown menus (in this build,
GP27was assigned to Options, andGP29to the PS Button). - After assigning all pins, make sure to click the "Save" button at the bottom of the page. When the blue confirmation banner pops up, your settings are locked in.
[📸 Insert Screenshot: GP2040-CE Web Config "Pin Mapping" screen showing assigned GP pins with the blue "Saved!" banner at the bottom]
Step 3: Booting into Your Desired Controller Mode
Once configured, the board automatically reboots and operates as a regular gamepad. Now it's time to switch to the connection mode matching the platform you want to play on.
GP2040-CE features a wonderfully intuitive naming scheme:"1 (B1) for Switch, 3 (B3) for PS3, and 4 (B4) for PS4."The numbers directly mirror the consoles! Remember this simple rule, and you'll never need to check a manual to swap platforms.
- Hold Cross / X (B1) while booting: Nintendo Switch Mode (Ideal for Street Fighter II on the Switch's 30th Anniversary Collection!)
- Hold Square / □ (B3) while booting: PS3 Mode (3 equals PS3! Perfect for playing Ultra SFIV on an authentic PS3 console!)
- Hold Triangle / △ (B4) while booting: PS4 Mode (4 equals PS4! Great for playing SF6 on PC with familiar PlayStation button prompts!)
Pro-Tip: Fast Mode Switching on a Bare Board
While working with a bare board before final assembly, you don't even need to unplug the USB cable to switch modes.
- Keep the board connected to your PC and powered on.
- Identify the pin corresponding to the target mode (e.g., for PS4 mode, B4 corresponds to
GP06/ Triangle) and bridge it to a nearbyGND (ground)pin with tweezers. - While holding that short, tap the tiny "RESET" button on the RP2040-Zero once.
- The board will reboot instantly into that console mode and save it to flash memory.
Step 4: Setting Up SOCD Cleaning Modes
Finally, the most crucial element for any fighting game: SOCD cleaning rules (Simultaneous Opposite Cardinal Direction).
For Street Fighter 6 on PC, "Up + Down = Neutral, Left + Right = Neutral" is mandatory under Capcom Pro Tour (CPT) tournament rules. However, for a charge-character player enjoying Ultra SFIV on PS3, having "Last Input Priority (Last Win)" makes dashing and switching charge directions significantly smoother.
We skipped this in Build #1 to avoid the nightmare of air-wiring four extra IC chips into a cramped case. But with the Raspberry Pi Pico, software hotkeys let us toggle input personalities in an instant depending on the game!
For SF6: Set SOCD to Neutral
In normal controller mode, press and hold the following buttons simultaneously:
OPTIONS (GP27)+PS Button (GP29)+D-Pad DOWN (GP03)
(*Sets both Up+Down and Left+Right to pure Neutral)
For USFIV & Charge Characters: Set SOCD to Last Input Priority (Last Win)
Similarly, hold the following combination in normal gamepad mode:
OPTIONS (GP27)+PS Button (GP29)+D-Pad LEFT (GP04)
(*Prioritizes the last-pressed direction, making charge moves and execution buttery smooth)
Once entered, the board's flash memory saves the setting, preserving your preferences even across console power cycles. This is the exact moment where letting software handle the heavy lifting saved countless hours of grueling hardware fabrication.
Wrap-Up
Ditching wireless in favor of the Raspberry Pi Pico (RP2040-Zero) made setting up Build #2 a remarkably smooth experience:
- • Flashing firmware is as simple as dragging a file into a folder.
- • Switch modes instantly: "1 for Switch, 3 for PS3, 4 for PS4."
- • Effortlessly map custom wiring through the Web Configurator.
- • Quick-switch between tournament-legal SF6 SOCD and USFIV charge-friendly Last Win via simple hotkeys.
The controller's software core is now fully configured and battle-ready—primed to conquer Street Fighter II, USFIV, and SF6 across original gaming hardware. In the next part, we'll dive straight into the hardware build: fabricating the custom enclosure and mounting the key switches. Stay tuned!