[PHP Vulnerability Fix] AWS Lightsail 2026 Migration to Native WordPress: Verification of Custom Code & Google Integrations
 Admin
2026 Latest Native Lightsail Environment and Network Configuration
Even before the PHP vulnerability issue, I received multiple notices from Bitnami saying support was ending and that I should migrate, but I kept ignoring them because it felt like a hassle. However, with the recent global wave of PHP vulnerability exploits and personal data leaks, I realized it was finally time to take action. So,
Instead of the once-popular Bitnami setup, I migrated to the 2026 standard: AWS Lightsail Native WordPress (non-Bitnami).
There aren't many choices left anyway, so it's straightforward.
Creating the Instance
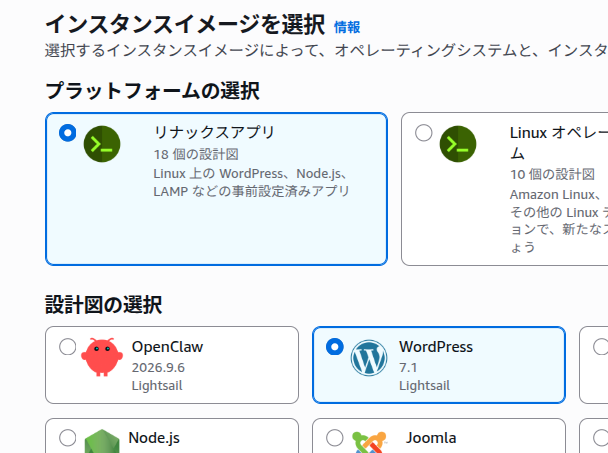
Default settings are fine, but make sure to select Lightsail here instead of Bitnami.
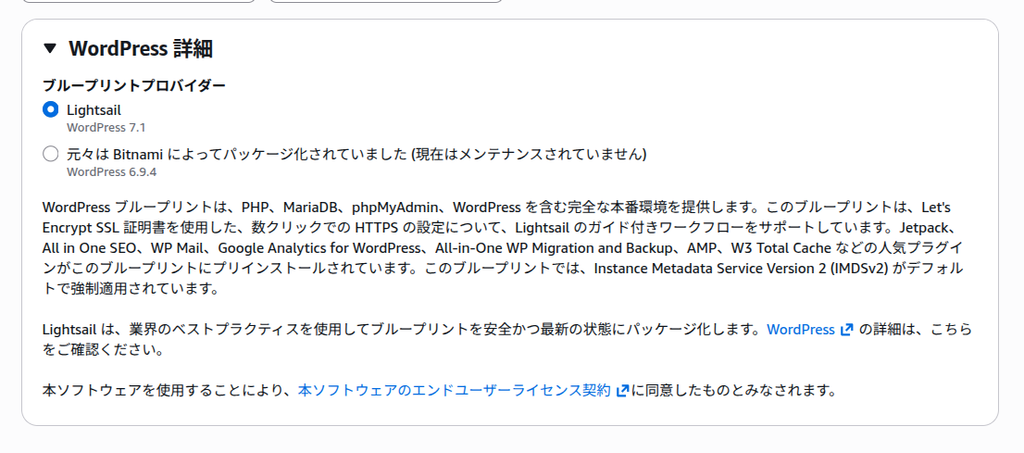
Once created, the web server is already running, so you can access it via its IP address.
Creating and Assigning a Static IP Address
Create a new Static IP address in the Lightsail console and assign it to the target WordPress instance.
Updating the Web Server Domain Address in DNS
Go to the Route 53 management console and update the custom domain for the web server (the-world-star.com)'s A Record value to the static IP address created above (e.g., 175.41.248.22).
Check the Public IPv6 Address (ending in 49ad) in Lightsail, and AAAA Record add it as a new record.
I was used to this part so I breezed through it, though it might have actually been included in the setup wizard.
SSL Setup
HTTPS and SSL certificate configuration.
Steps: Launch the wizard in the Lightsail console and proceed to "Lightsail Setup".
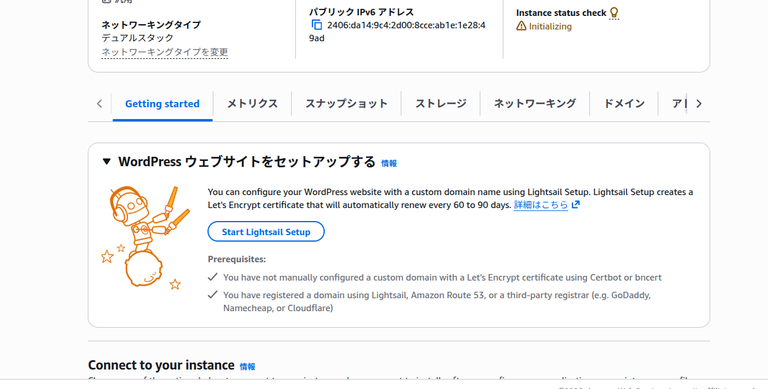
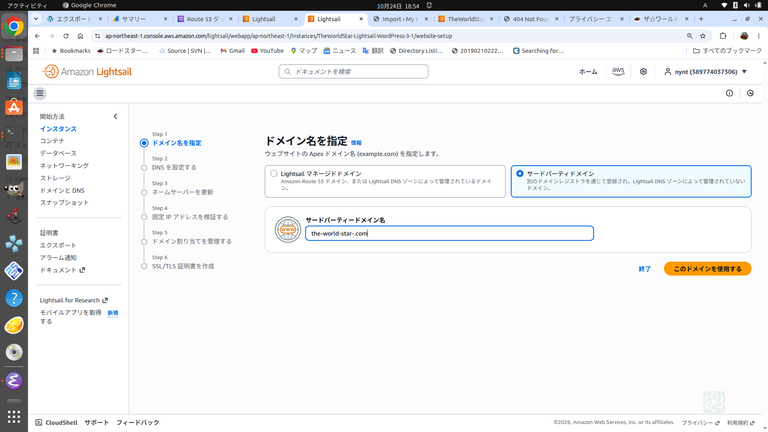
- Step 1:Specify a third-party domain, as the domain was acquired through Onamae.com.
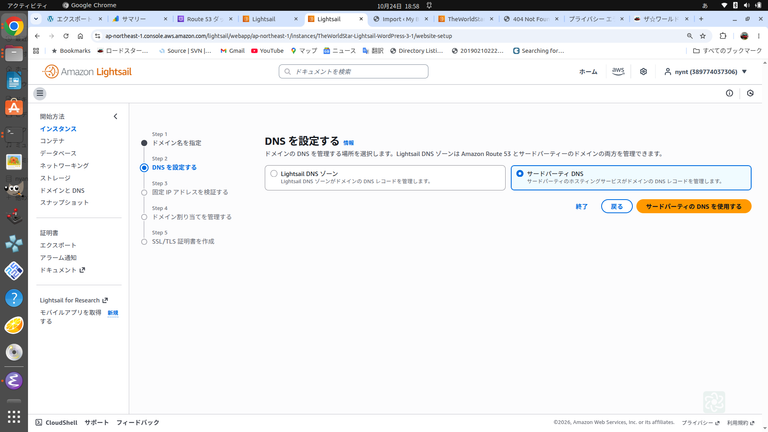
- Step 2:Select "Third-Party DNS" on the DNS configuration screen because the domain was purchased at Onamae.com—even though DNS is managed by Route 53.
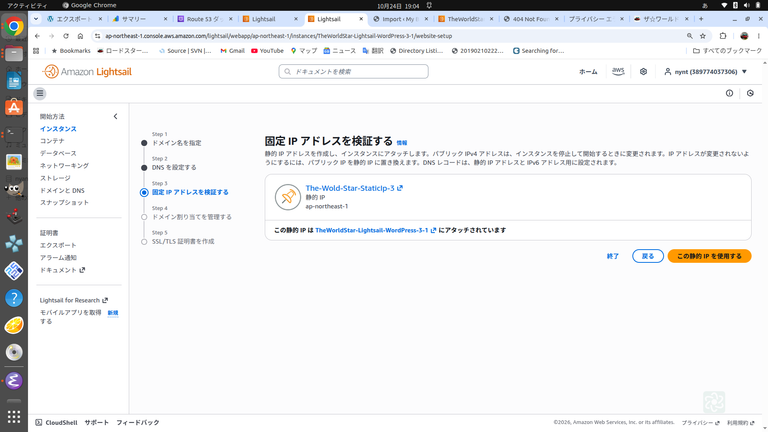
- Step 3-4:Follow the on-screen prompts to proceed with "Validate Static IP Address" and "Manage Domain Assignment".
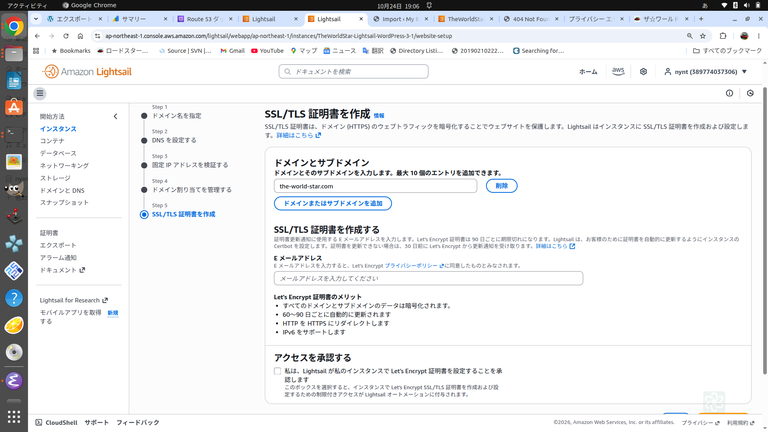
- Step 5:Enter your email address, check the checkbox, and click "Create Certificate".
2. Important Notes
- 2.1 IPv6 Check:Because the wizard enforces validation for both IPv4 and IPv6, make sure to register Lightsail's Public IPv6 Address (ending in 49ad) in Route 53 as an AAAA Record in advance. Without this record, a validation error will lock you out.
- 2.2 Do Not Create New DNS Zones:Do not let Lightsail create an unnecessary "DNS Zone" (empty container). Doing so can break existing Route 53 record configurations (including S3 records like
static.). - 2.3 Fix for Legacy Artifact ("File exists") Errors:If leftover files from past CUI operations exist, the automated script will crash during the final step. If it fails, run the following single line via SSH to delete the file before clicking "Resume Setup".
sudo rm -f /usr/bin/certbotUse code with caution.
I got seriously stuck here because I did whatever Gemini told me without looking into it... Gemini didn't realize its information was outdated, and when things failed, it tried to push through with its own knowledge, leading into a complete quagmire. AI pretends to know things based on old data. Be careful with this. The key is simply following the AWS Lightsail setup wizard and official help.
Logging into the New Server
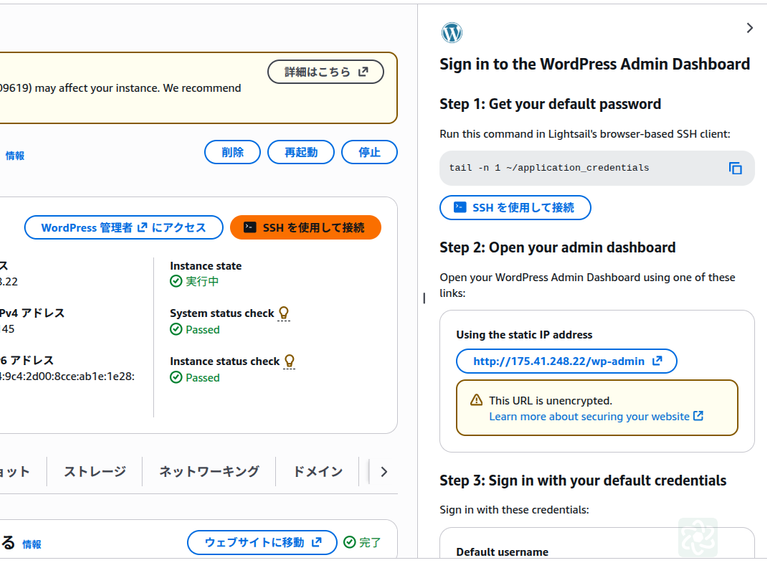
Clicking "Access WordPress Administrator" opens the settings and instructions on the right side. Just follow them.
You can access it at http://IP-address-or-URL/wp-admin/.
The initial user ID is user, and the password can be checked by using "Connect using SSH" and running a command.
tail -n 1 ~/application_credentials
Data Import Process with All-in-One WP Migration
Once the new server environment was set up, I imported and fully restored the 250MB+ backup data exported from the old server using the "All-in-One WP Migration" plugin.
Images are hosted on S3, so no backup was required and they can be used as-is. Check the box to exclude everything except the media library, then download.
On the new server, the import plugin was already installed, so I just had to activate it. Here, I changed the PHP upload size to 512M and adjusted the timeout settings.
Preparation: Increasing PHP Upload Limit and Timeout
To import the 250MB backup file, edit php.ini on the new server to increase the limit. For native WordPress (Debian), the file is located at:
bash
/etc/php/8.2/apache2/php.ini
Use code with caution.
[Changes]
ini
upload_max_filesize = 512M
post_max_size = 512M
memory_limit = 512M
max_execution_time = 600
Use code with caution.
After configuring, restart Apache2 to apply the changes.
bash
sudo systemctl restart apache2
Use code with caution.
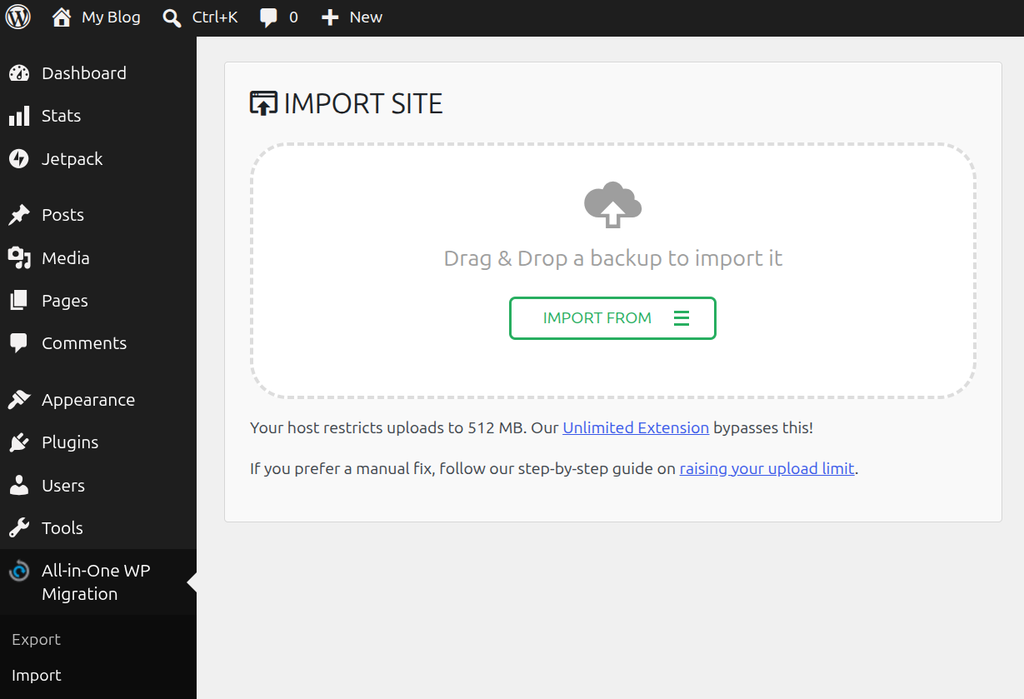
Freezing at "Blogs prepared."
When initiating the import, the progress bar went up to 100%, but then completely froze on the "Blogs prepared." screen.
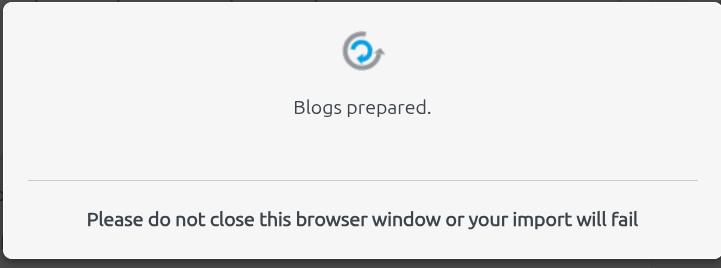
I suspected a timeout, but checking Apache's additional error log (/var/log/apache2/error.log) showed the cause was something else.
Log:
[Sat Oct 24 08:34:10 2026] [php:error] [pid 17655:tid 17655] [client xxx.xxx.xxx.xxx:5886] PHP Fatal error: Trait "Automattic\Jetpack\Connection\Traits\WPCOM_REST_API_Proxy_Request" not found in /var/www/html/wp-content/plugins/jetpack/_inc/lib/core-api/wpcom-endpoints/class-wpcom-rest-api-v2-endpoint-email-editor-bootstrap.php on line 30, referer: http://xxx.xxx
At the final stage of the import process, a Fatal Error due to file corruption in the Jetpack plugin occurred, bringing processing to a complete halt.
The Real Root Causes Behind the Problem (Combined Factors)
The freeze and migration difficulties were caused by a combination of environment mismatches and rework:
- Incompatibility due to PHP upgrade (PHP 8.1 → 8.2):
Legacy Jetpack code brought over from the source environment (PHP 8.1) conflicted with the new environment's (PHP 8.2) strict type checking and class loading rules, triggering a Fatal error. - Collateral failure of WP-CLI:
I tried to safely disable the plugin via command line (WP-CLI), but because the Jetpack error fired before WordPress core initialized, even commands likewp pluginwere caught in the crash and forced to terminate.
Solution: Physically Force-Disabling the Plugin via SSH
After deleting the instance to rebuild a fresh environment and start over, since even WP-CLI wasn't functioning, I directly renamed Jetpack's plugin directory via SSH to physically prevent the system from loading it.
bash
user@stored-instance:~$ sudo mv /var/www/html/wp-content/plugins/jetpack /var/www/html/wp-content/plugins/jetpack_old
Use code with caution.
The moment the directory was renamed, the system was cleared of the error, and the frozen import screen in the browser immediately resumed.
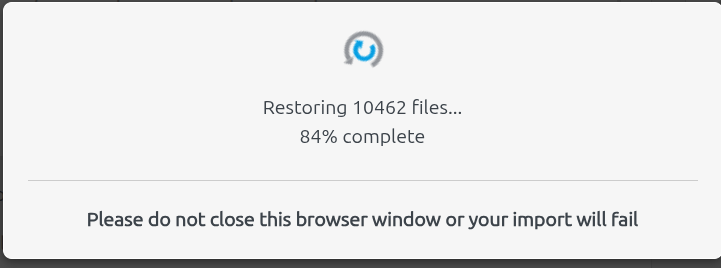
Import Complete
The file restoration ran successfully to the end, completing the import process.
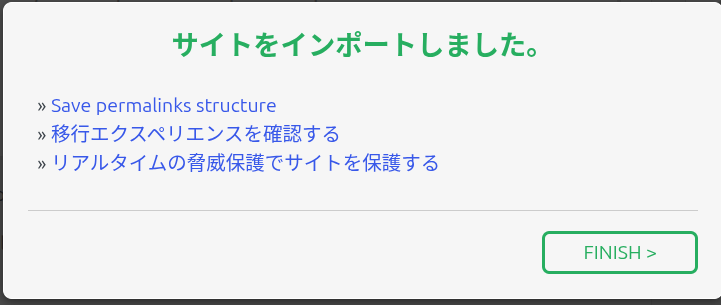
Attempting an installation through trial and error without a clear understanding of the new server's specifications leads to rework and is extremely risky.
Starting over with a clean environment, pinpointing the root cause (Fatal error) in the error log, and handling it physically was the ultimate key to recovering from the breakdown.
Configuring Permalinks
Right after migration, accessing posts or pages caused 404 errors (Page Not Found) due to routing mismatches. In the WordPress admin dashboard under "Settings ➡️ Permalinks", click "Save Changes" once. This writes the correct rewrite rules to the new server environment, instantly restoring links for all posts. Previously, when testing under web2.the-world-star.com before switching to the production URL, I struggled with link rewrites; I believe clicking "Save Changes" under "Settings ➡️ Permalinks" once is all that's needed in that situation too.
At the same time, I verified on the live server that "WP Offload Media (S3 integration)"—which manages media assets externally—maintained its connection to the S3 bucket after migration, transferring all media library image data without trouble.
Offload Media Lite Plugin: Configuring Image Uploads to S3
This required fixes. I recall a warning appearing to the effect of "There is a compatibility issue, so wp-config.php will be modified—be careful."
1. Symptom
Right after migration, URLs for new images remained as wp-content/uploads/... (local) and were not transferred to S3 (static).
2. Cause
Due to the migration, settings inside wp-config.php such as AWS access keys and plugin settings (AS3CF_SETTINGS) had been reset.
3. Resolution Steps
① Adding credentials to wp-config.php
/var/www/wp-config.php: Add settings above /* That's all, stop editing! Happy publishing. */.
php
define( 'AS3CF_SETTINGS', serialize( array(
    'provider' => 'aws',
    'access-key-id' => 'YOUR_AWS_ACCESS_KEY_ID',
    'secret-access-key' => 'YOUR_AWS_SECRET_ACCESS_KEY',
) ) );
② Restarting Web Server
sudo systemctl restart apache2
4. Syncing Specific Files to S3
Due to free version plugin limitations preventing bulk sync of past files, I combined WP-CLI and AWS CLI to re-upload only the 15 images created today (Screenshot-from-2026-10-25*).
Verification of Custom Theme and Plugin Code on Live Machine
Over years of operation, custom code tweaks were directly added to themes and plugins. I verified on the live machine how these were carried over into the 2026 environment (Native WordPress 7.1).
As a result, thanks to complete overwrite restoration by the import plugin combined with the theme's dramatic evolution,"All expected behaviors were maintained and cleared without any manual fixes (All is ok),"achieving the best possible outcome.
① Same Category Restriction for "Previous Post" / "Next Post" (next-prev.php)
When updating the theme in the past, navigation at the bottom of articles pulled latest posts from all categories, requiring manual file argument edits. However, opening the actual file via the web console for visual inspection showed that the hook argument was already set to true in its default state.
php
$in_same_term = apply_filters( 'lightning_prev_next_post_in_same_term', true );
Use code with caution.
This means that with theme (Lightning) updates, official updates caught up with default behavior to "prioritize the same category when displaying previous/next posts". Checking below the latest post confirmed past posts from the same category are cleanly linked without mixing in other categories.
② Filtering Sidebar "Recent Posts" by Category
The sidebar "Recent Posts" section, category top image displays, and filter hooks in functions.php (such as archive truncation and automatic Japanese slug conversion) are operating normally without additional manual edits, thanks to standard theme feature evolutions and carried-over plugin data.
I checked various other elements, and all my custom code was included and migrated on its own. Did I build it that way back then? I'm a bit unsure, but for now, it's working just like before.
Post-Migration Behavior of Google-Related Tools (Site Kit / AdSense)
- Google Site Kit:Since authentication tokens are reset during server migration, re-signing in (re-linking) via the admin console immediately restores data tracking.
- Google AdSense:Because it is linked via the custom domain, ad code, and
ads.txt, no reconfiguration is required once normal display is confirmed after DNS switching.
Summary
The server migration to the 2026-spec native Lightsail environment was a complete success, cleanly inheriting all settings from import through customization verification with zero manual code fixes required.
Addendum: ads.txt
I noticed this later.
Place Google AdSense's ads.txt at the web root. An AdSense warning appeared. Following the warning allows copying the text string, so create ads.txt in /var/www/html (or similar) and paste the copied content.